Hi guys!
As you know, I’m not much of a writer but I wanted to share our mudroom makeover process with you.
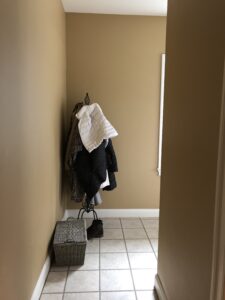
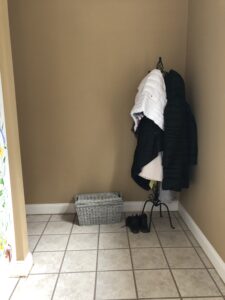
Our old mudroom was the last room on this floor that was really untouched since we moved in 4 years ago. It was old and dated with a tile floor you simply could NOT keep clean because all the natural crevices & cracks just held the dirt!
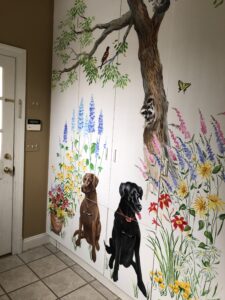
It also had cabinets that, while I loved all the storage, had a custom mural painting of the previous owners dogs and rabbits & raccoons and butterflies!!
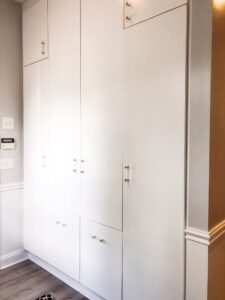
So we decided to redo everything! We repainted the walls & ceiling, we replaced the floor with a floating wood floor, we added a chair rail and new floor moldings and we repainted the lovely cabinets.
We did ALL of the work ourselves and it took about 1 week. Not bad considering a 2&5 year old!!
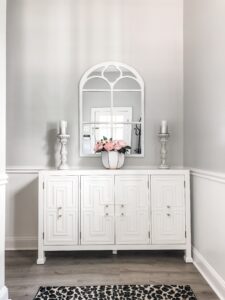
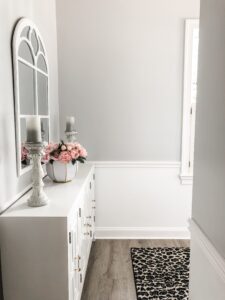
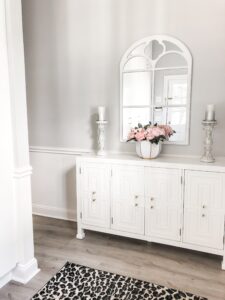
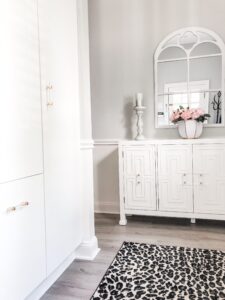
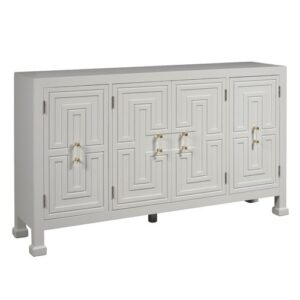
I also added a great credenza I found at Wayfair. I love the touch of glam and I really enjoy changing the decor on it every season! It was also great working on it with my husband. We are a good team!
Flooring
As I mentioned, we had an old 12” tile floor that was impossible to keep clean(and you know I’m freaky about clean!)
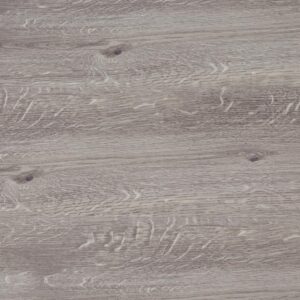
We thought about another smooth/polished tile floor. We also thought about an oak floor to match our kitchen flooring. In the end though I wanted a contrasting floor to go with the kitchen so the space had a clear separation. I chose a 7.5” grey Luxury Vinyl Plank Flooring from the @homedepot Home Decorators Collection. I loved the color, texture and the fact that it’s waterproof is a home run! It’s also REALLY easy to cut and lay using just basic techniques. And while cutting under the existing moldings was tedious, we got it done and installed in about 2 days. And just a few hours to install the kick molding and BOOM! DONE! I’m really happy with the way it turned out.
The paint
The old color was a dark tan. It had effect of making the room seem dreary and dull. So we knew we were going to go with a brighter color to brighten it up and make it more inline with the rest of our 1st floor rooms. In the end I chose Behr Halation paint and Primer in one. It more closely matches the Pebble Grey in most of the other rooms and I love the bright & welcoming feel I get when I come in the side door now!
We also HAD to paint the door because you remember that cabinet painting of the old owners dogs I told yo about?? Well, it seems they enjoyed looking out the window. A LOT!! There were a million claw marks in the wood!
But with some Painters Putty and some time-consuming effort, it’s like it never happened!!
I chose a semi-gloss finish for the walls and moulding and eggshell for the ceiling, which I kept white. (white white by Behr)
Just the fresh paint alone made a HUGE difference!! Am I the only one who loves the smell of paint?
Accessories
Rug
I chose a leopard-print rug that’s a little bold but I absolutely love it. We used 5×7 and it fits the space really well and is really central to the new design.
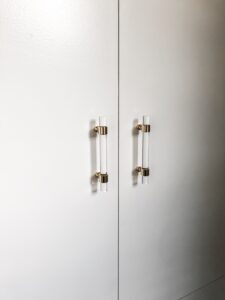
Door Handle
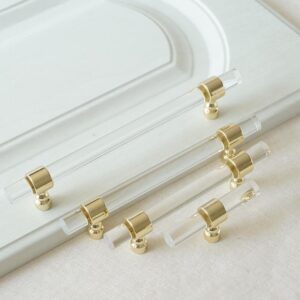
Finally, I found acrylic door knobs that not only matched our credenza but also gave another glam touch! I found them on #etsy and I love the look! You can get just acrylic or with silver or gold accents. Perfect for any room!!
I’m also going to refer to the chair rail as an “accessory” but it really did kind of “finish” that space! I’m shocked how much so! @homedepot has tons of selection and in both wood and composite. We like composite because it seems easier to work with and resists cracking when you nail it to the wall. We used our new nail gun which made it super easy. And kinda fun!
Before & after
Here are some pics of before & after. I’m really happy with how it turned out! It’s a clean, modern, glam look and it gives a totally different feel when you enter our side door!
I hope you like it as much as I do!
It was a fun, easy and really impactful project. Any of you could do it! Total cost including paint, flooring and moldings was about $1500
SO worth it!!
Shop Sources


XO;
KATALIN